Mastering In CoreData (Part 6 Relationship Between Entities in Core Data CRUD Operation)

For the purpose of this part we will extend our Todo application. In this part we will look into how to perform CRUD operation in the architecture where there are many entities and one entity having a relationship with other entity.
Please refer to part 5 to understand the entities and their relationship in the project we will be working
Create Record to Core Data
The process of adding the records to Core Data having relationships between entities has following tasks
- Refer to persistentContainer from appdelegate singleton object
- Create/Access the singleton managed object context from persistentContainer
- Created an first entity with Task and set values for each property
- Created an second entity with Task and set values for each property
- Created an entity with Passport and set values for each property
- Created an entity with User and set values for each property
- Associated two tasks we just created to user object which is representing tasks associated to User. Since User → Task relationship is One-To-Many NSSet was used
- Associated passport we just created to user object which is representing passport associated to a User. Since User → Task relationship is One-To-One property was used
- Save it to the disk (Persistent Store)

By calling save it will save to the disk file which is sqlite which is store in documents directly you can find the location by calling static method defaultDirectoryURL on NSPersistentContainer shown in Figure 1,2 and 3 records we just created stored on disk.


Fetch Records from Core Data
The process of fetching the records from Core Data having relationships between entities has following tasks
- Refer to persistentContainer from appdelegate singleton object
- Create/Access the singleton managed object context from persistentContainer. As you can see we are doing this repetitive work every time, we will fix this when we architecting our persistent layer with Core Data in later part
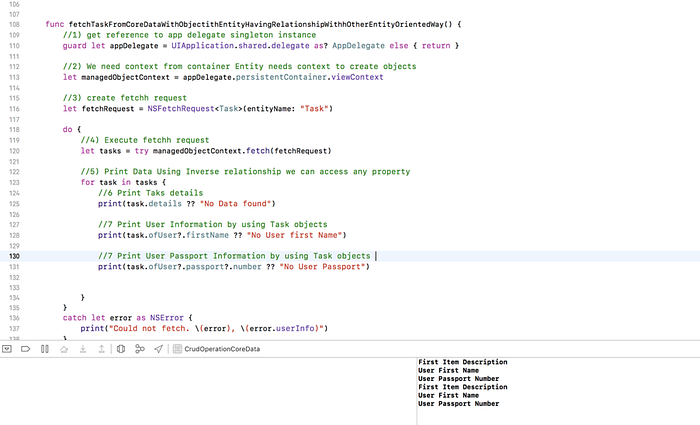
- Created a fetch request to tell Core Data stack to look only those Entity having name Task
- Executed our fetch request and it will return array of Task objects from the persistent store
- Iterate on task objects we just fetched from the core data stack
- Print Task details in an object oriented style
- Since we created inverse relationship we can access User property as well. This is one of the benefits of inverse relationship. As you can see we access user.firstname property using Task object reference. Due to inverse relationship Task object was also holding User object reference.
- Finally we can access Passport information using Task objects. Thanks to the inverse relationship. In later part we will see more benefits of using inverse relationship
Delete Records from Core Data
The process of deleting the records from Core Data having relationships between entities has following tasks
- Refer to persistentContainer from appdelegate singleton object
- Create/Access the singleton managed object context from persistentContainer. As you can see we are doing this repetitive work every time, we will fix this when we architecting our persistent layer with Core Data in later part
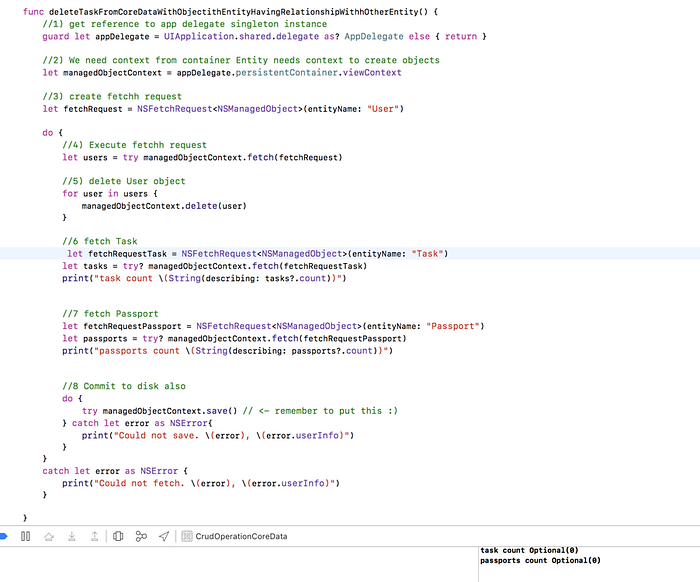
- Created a fetch request to tell Core Data stack to look only those Entity having name User
- Executed our fetch request and it will return array of User objects from the persistent store
- Iterate on User objects we just fetched from the core data stack
- Delete User using delete() method on a context
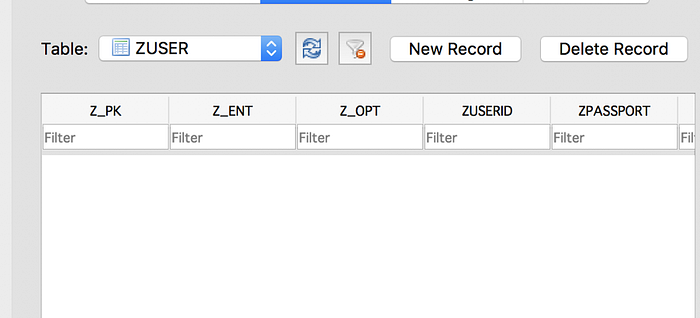
- Since User → Task delete rule was Cascade as we deleted User object. It will automatically delete all the tasks associated to user and as you can see in the Figure 5 task count return 0 task objects in the database.
- Since User → Passport delete rule was “Cascade” alsp, as we deleted User object It will automatically delete the passport information associated to user and return 0 count as well
- On disk all data still persist until we called save. After calling save() method on a context it will dump context (which acts like cache ) data to disk. Now disk and context have same state which means both contains no data physically or in memory
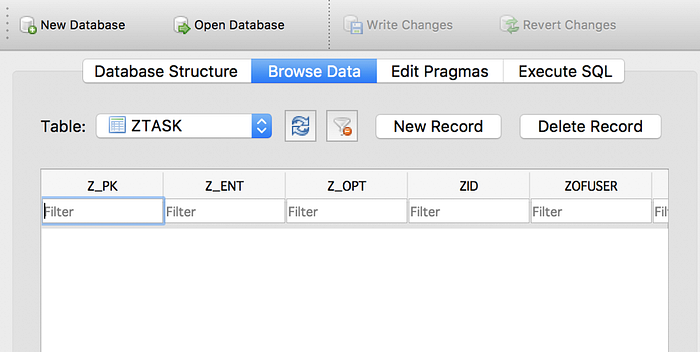
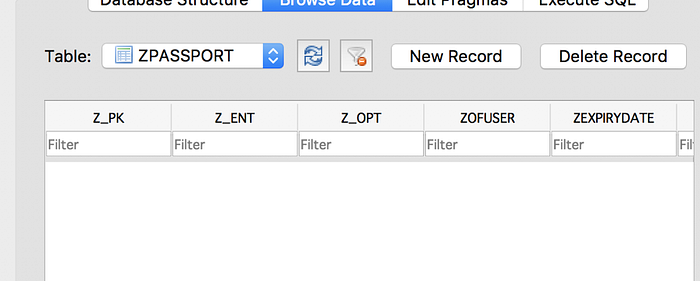
By opening sqlite file on DB Browser For SQlite you will see all data is deleted from file as well as shown in figure 6,7 and 8
Summary
In this part and part 5 we looked how to create relationship in Core Data and we also looked how to perform CRUD operations in Entities having relationship. Finally we see the benefits of inverse relationship and delete rule Cascade with the help of code.
What Next?
In the next part we will look the delete rule in an depth with the help of coding and diagrams.